Tuesday, January 29, 2008

Sweet Notes and a Contest with Sweet Rewards

Last fall I wanted to write some notes on ice cream note cards, and I had a heck of a time finding anything I was really excited about. Since then I am constantly on the look out for nice ice cream stationery to say "Thank you for the nice ice cream scoop" or "So glad you came over to chat over ice cream." Cupcake cards, as beautiful as they are, are popping up all over the place, but, my frozen treat friends, ice cream cards aren't so easy to come by.

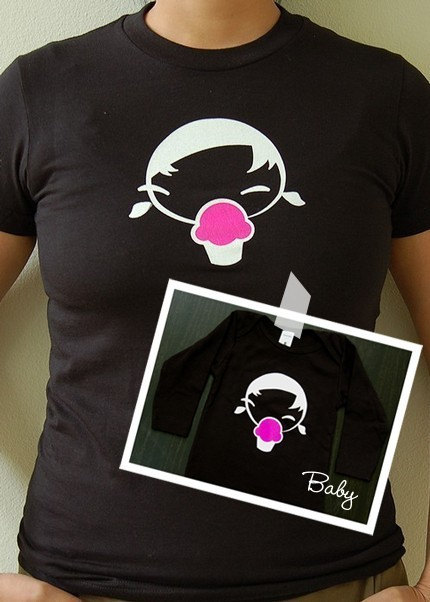
I found a few cute cards on Etsy as well as some more commercial products, but the pickin's, though wonderful, are slim.


It was these cards on the right by Chronicle Books that I ended up using last fall in my search for ice cream notes. This box of twenty note cards (five designs repeating four times each) features ice cream signs along the highway taken by San Francisco based photographer Troy M. Litten. These cards remind me of summertime drives, pulling off the highway for a spontaneous ice cream treat.

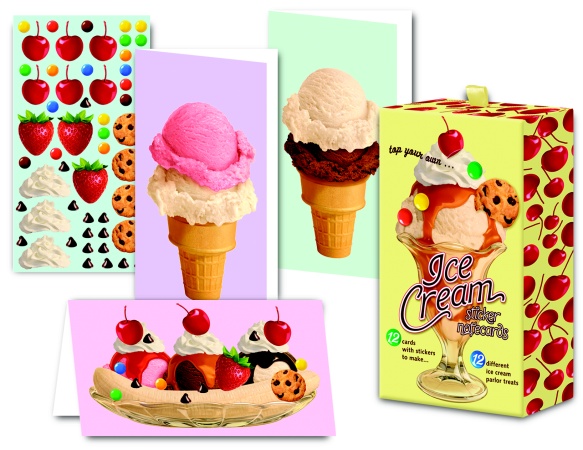
As a lover of stickers and ice cream (I know, what am I, six?) I was thrilled to find the cards at left by Potter Style, an imprint of Random House. The blank ice cream cards work wonderfully on their own, but you can add some flare by sticking strawberries, whipped cream, chocolate chips and things of the sort all over the cards. Luckily, they don't have sprinkle stickers, so you don't have to stick teeny sprinkles one by one! [I also found these on buy.com, amazon.com, and many other places after doing a google search on "ice cream note cards".]

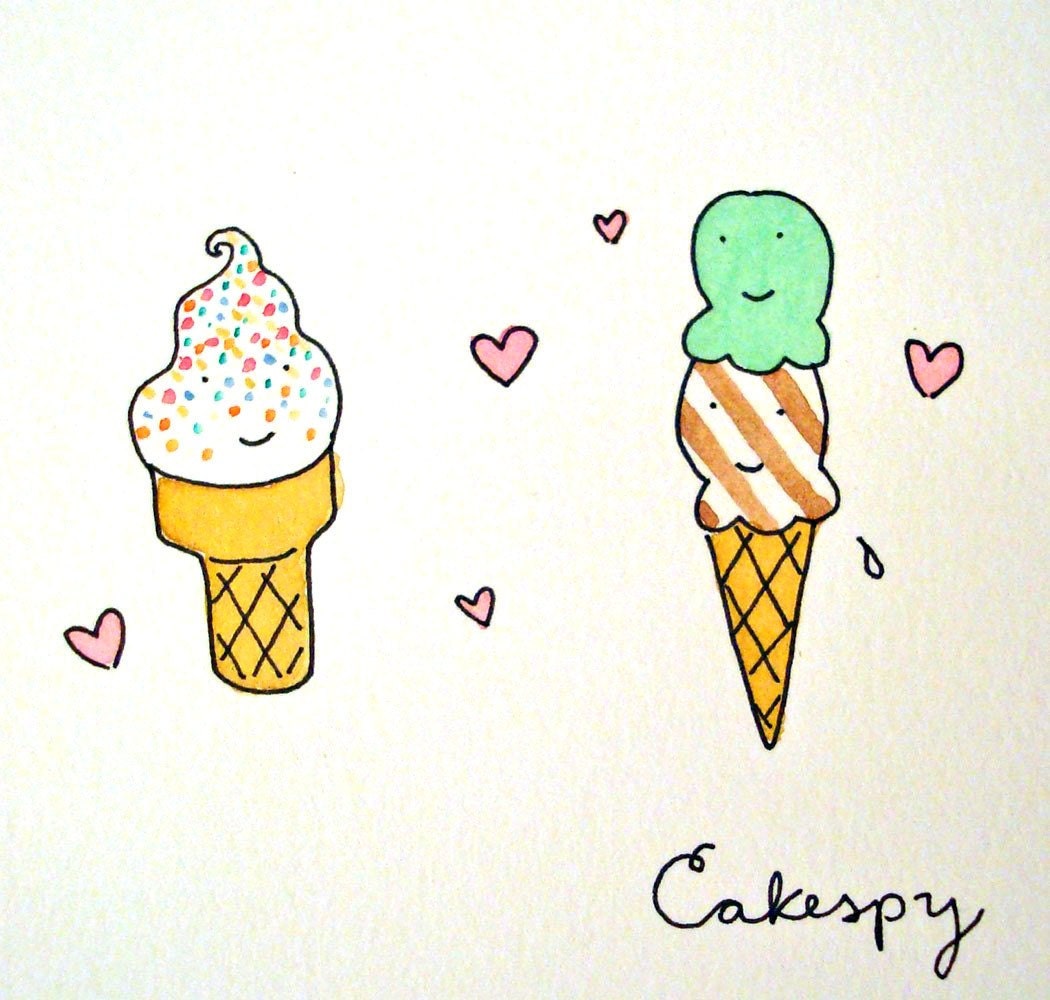
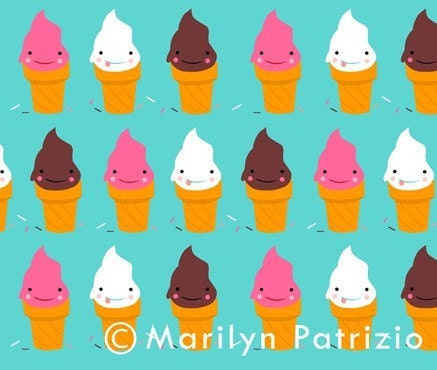
Seasoned Etsy member Marilyn Patrizio has some super fun ice cream cone notes in her Etsy shop. What could be more fun than a smiling ice cream cone? You can buy them singly or as part of an assorted set, or if you just want to stare at those little faces all the time and not send them away, you can also buy the cones on the cover of a notebook.

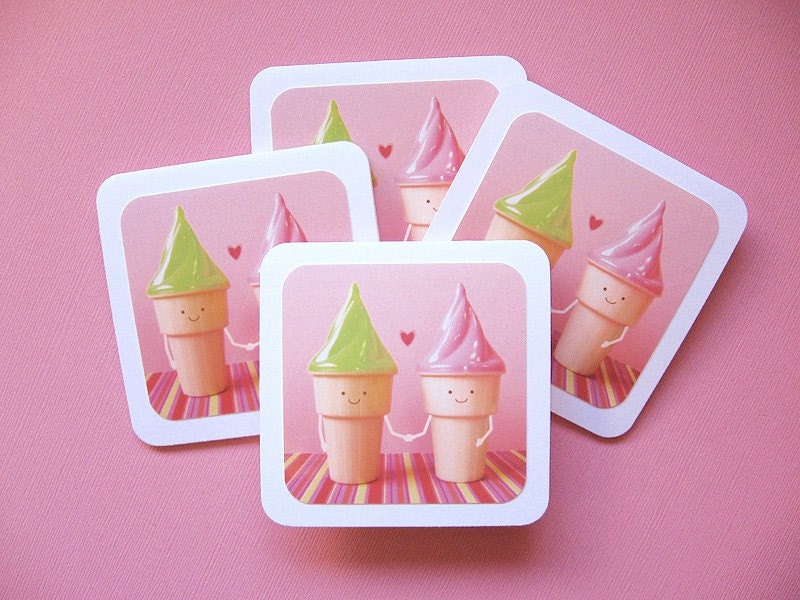
Canadian artist Rachael Herbert of Rubyfaz on Etsy also puts a smile on our faces with her smiling ice cream cones. Whether you want to write someone a short short note, or add an adorable gift tag to a package, Rachael's mini cards are just the answer. Rachael's website is also beautifully designed and features some great work, and her blog is super fun as well. I was just so enamored with today's posting of Flossie.


* C O N T E S T *
Reply to this post with a link to your own great ice cream stationery find and you will be entered in a random drawing for a coupon for a free pint of Ben and Jerry's Ice Cream. Send all entries by next Monday, February 4th and be sure to include an email so I can contact you if you are indeed the winner!

Saturday, January 26, 2008

1 month, 5 flavors and lots more to go

So its been 1 month since I made my debut into the ice cream making world and so far so good and I thought I'd share a few things I've learned and tips I'd give others just starting out.

Since I always have to do tons of research about anything I do I spent my first week or so reading, searcing the web for tips, and just soaking in anything I could learn to make ice cream perfection. What I quickly learned is that there are two types of ice cream, custard based(with eggs) and Philadelphia style(no eggs) which through the experiment of both the custard wins big. Who would have thought that its egg yolks in ice cream which give it a creamy smoooth consistency but this is the secret ingredient in the custard base style ice cream that makes all the difference. I made one batch of the Philadelphia style and it was my first and last.

So what else have I gotten out of my first month of churning? I quickly learned how crucial it is to master the technique of heating of the custard. Since there are eggs in this its important to slowly heat, consistently stir, and wait for the moment of perfect consistency(sort of like Pepto Bismol thickness) or the result is this scrambled egg mixture we've mentioned before. The custard needs to heat to 175 degrees (to avoid bacteria from the eggs) and it should lightly coat the spoon. Through experience, use your eye over the thermometer...I learned the hard way when my thermometer was wrong. After 5 flavors I am still battling this one but give me a few more tries and I'll be golden. But regardless, the resulting ice cream still ended up worth every bite.

Here are the five flavors I have made so far and results of each.

Peppermint Stick
(careful how much extract, mine was strong and I think because of this the alcohol in the extract

stopped it from freezing hard but it was super creamy and really good)

Butter Pecan
(tried this Philadelphia style...icy and not enough flavor...not a winner)

Ginger
(infused actual giner into the base, hardened well and the creaminess and flavor was awesome.
Just bought crystalized ginger that will add a nice crunch next time)

Triple Chocolate
(bittersweet chocolate, semisweet chocolate, cocoa & dark chocolate chunks...got rave reviews by my testers)

Mint Chocolate Chip
(infused mint leaves and added dark chocolate resulting in a unique herbal flavor for the mint
but it was really good with a great consistency)


Lessons learned..
-the more egg yolks the smoother and creamier
-slowly heat the base
-infusing flavors gives a stronger and more natural flavor
-after base is heated, cool over an ice bath for better consistency
-seal the top of the ice cream with plastic wrap before putting the lid on the container, it keeps the this layer of the ice cream from drying out

So although this may not be the most exciting post I think its important for anyone starting out to understand the basics, this is where this blog came from. I couldn't find anyone talking about their adventures in ice cream making so why not do it ourselves.

Happy ice cream making...I am off to make Oreo Cookie!

Monday, January 21, 2008

Fabulous Inedible Ice Cream Finds!

Having a couple of friends who love ice cream as much as I do, including my co-blogger, I am always on the lookout for ice cream related gifts. This isn't as easy as it seems. I searched for quite a while and picked out a few of my favorite finds on Etsy...

I know I am a sucker for tiny things, but these adorable sweaters take the cake...er, um, the ice cream. Kim at Kimbermouse tells me that customers "can order any flavor of ice cream on any color sweater in any size (6 months through 8 year). I have even done mint chocolate chip with mini chocolate colored spots." I am not sure it's appropriate for a 28 year old woman to be wearing an ice cream cone sweater (though I DO love it), I'd love to own a sweater with a collar like this one. How cozy.

I am simply in love with this image of a little girl eating ice cream on this teeshirt by Turtlepapers. What's even better is that you can start your little one off early in sharing your love of ice cream by buying her her own lap tee with the same design.

For the small art collector (small size yet big impact!) there are the ever so popular ACEOs ("art card, editions and originals"). I am completely a newbie when it comes to these little cards. After seeing "ACEO" all over Etsy, I finally just last week wikipediaed the word to find out what they are.

At left, Dilkabear's ACEO painting of a bear holding an ice cream on a stick is one of a kind. This tiny piece (3.5 x 2.5 inches) is painted in a limited palette of gold and yellow, and it seems to be this palette that makes the piece so warm and and inviting, even though it's a painting of a winter day. At $7.00, this little painting is a bargain, and once framed (see below) would make a lovely gift for a friend, yourself, or a favorite ice cream blogger.

Sizing in at 2.5 x 3.5 inches, Six06's little robot holding an ice cream cone is so endearing that one might forget robots are supposed to be cold, metal, emotionless creatures. And he seems to love ice cream as much as we do. How could we not love him? (It's also quite a treat to visit Six06's website if you have a few minutes to look around.)

How might I display these adorable pieces of art? On my cluttered desk, I am looking at a Cakespy original, framed in what seems to be the perfect sized frame. I asked Ms. Cakespy where she got the perfect frame, and she (see below) tells me that she gets these little black frames at Bed Bath and Beyond, and with an opening of 2x3 inches they seem to be almost the perfect size for framing ACEOs (better than nothing if you want to frame your original piece of artwork -- I don't know of anywhere that sells 2.5x3.5 inch frames). I couldn't find them online, but I might suggest you check out your local BBB for framing these adorable pieces of art.


I've been a long time fan of Cakespy's blog and cupcake drawings, but this talented artist and sweet tooth has also put some love out for the ice cream loving community. This little watercolor in an 8x10 mat, chooses no favorites, sharing the love of both soft serve and hard ice cream. These originals are so endearing that you can't help but smile when you see one of Ms. Cakespy's drawings, and priced from $15 to $35 for one of these originals, you can't go wrong.

This adorable ice cream cone pinata from Birchangel might more appropriately be filled with gifts than given as a gift. However, I might just buy it to hang in a child's room, because it is too beautiful to break. I love the texture in the ice cream itself and the burlap cone. Birchangel also caries a variety of other sweet treats for the breaking in her shop. With prices from $14-$32, these pinatas are a steal.

Finally, its not just for people anymore...Bill Pickle's Dog Company makes ice cream cone shaped treats for your favorite pup. These are so yummy looking that it I didn't know better, I'd order them for myself.

Well, enough window shopping for me. I should probably get back to work.


Sunday, January 20, 2008

Cones NYC

There was no ice cream making for me this weekend due to the fact that I went to Manhattan to visit my oldest and dearest friend. The one stipulation of my visit though was that we visit at least one ice cream shop in the city. Ashu had done her research and offered me a variety of yummy sounding choices. Our final decision came down to the ice cream shop that fit best in with our plans of gallery hopping in Chelsea. After our art intake, we hopped a cab to Bleeker Street for ice cream at Cones. After some serious tasting (chocolate sorbet, blackberry sorbet, dulce de leche, and zabayone), I finally decided on mint chocolate chip ice cream. Ashu decided on chocolate ice cream. Ashu was so excited for me to try hers that I tried it before tasting mine -- it was fabulous. However, the sweet chocolate flavor left in my mouth caused my first bite of mint chocolate chip to be overwhelmingly minty, and I was a bit disappointed in my choice. However, a few bites later I was back on track, the mint had mellowed, and I was back to enjoying my own choice.

This Argentinian ice cream hot spot lived up to its great reviews. (Only a few of the many reviews -- Google search on "Cones NYC" produced numerous results.) Not familiar with this Argentinian's recipes, I was expecting something in the vein of American ice cream but it was denser -- it definitely reminded me of the Italian gelatos in Boston's North End. (For the difference between gelato and ice cream, you can find a good description here.) The ice cream was rich while light (in texture only. I am sure it was not light in the calorie sense of the word), creamy, and wonderfully sweet.

It was comforting and homey to find the friendly owner working the counter, and thanks to the cold weather outside, the scoop shop was empty except for one other couple, so it allowed Ashu and I to snag one of the two other empty tables. Word to the wise, warm weather visits to this shop probably won't promise seating, but the charming Bleeker Street is the perfect setting for strolling with a cup or cone of ice cream and some window shopping.

[I apologize for the not so great phone photo.]

On a side note, I just found an exciting website (World of Ice Cream) with both commerical and homemade ice cream recipes. Located on Long Island, World of Ice Cream also offers ice cream /gelato making classes.

Thursday, January 17, 2008

Infusing flavor


I finally got around to making my favorite flavor, Mint Chocolate Chip. I found a recipe in this great ice cream cookbook, A Passion for Ice Cream, which is filled with amazing ice cream recipes that are all also paired with desserts. Since I am on an ice cream mission I left out the dessert aspect of this recipe which was fudge cookies but I am sure I'll get around to those later. Actually, the image on the cover of this book is this recipe. (I know its not green but she prefers to let the flavor speak for itself..I had to add the green to mine).


So onto the infusing part. Infuse: to steep in liquid without boiling so as to extract the soluble constituents or principles...and this is what I did. Instead of using Mint extract the recipe called for using actual mint leaves and cooking them with my cream/sugar mixture. Once heated through and before adding this to the egg mixture I strained the liquid to omit the leaves and, voila, pure mint flavoring. I was a little skeptical when straining as my leaves were brown, wilted, and not so pretty but I guess that is what happens when you cook leaves. So after finalizing the whole process, refrigerating the base overnight and then freezing, the verdict is out...definitely good mint flavor but somewhat unique. I am curious to see what others think. My husband thought it was definitely mint but tasted like leaves! So I just did a second taste test to be able to really describe it and the only additional thing I could say is that is has an herb like taste...but after the initial bite all I taste is yummy Mint Chocolate Chip. I think this could become my signature flavor..its my favorite but with a twist.

And the cute cow bowls..my girlfriend recently went to the Ben & Jerry's plant and brought me back these fun cow dishes...love em.


Monday, January 14, 2008

Yo! Cinnamon Fro Yo!

I guess that wasn't the most creative of names, but I am trying! I had this yogurt that I made my Donvier yogurt maker that was just not the right consistency so I thought to make it into frozen yogurt. Perfect idea. I didn't waste the yogurt and made a fairly healthy treat of cinnamon frozen yogurt (see right), that even my husband liked!

I used the recipe from Bruce Weinstein's The Ultimate Ice Cream Book for Vanilla Frozen Yogurt, but altered it a bit to my liking. My yogurt was a little sour (yogurt is more sour the longer you "cook" it and even with the added sugar and the two tablespoons of vanilla, this recipe was a little too sour for my liking. I added a teaspoon of cinnamon and voila! it was just to my liking! The other little change was I replaced the light cream with a mixture of 1/2 cup heavy cream and 1 cup skim milk. With the skim yogurt I had made, this recipe was pretty light and some what healthy, as far as ice cream goes -- and the texture was pretty creamy as well. Yes, I am of the belief (just like Tina) that ice cream is ice cream and one shouldn't cut corners on the fat or sweeteners, but in my case I had to use what I had in my house (it was late and I didn't feel like going to the store) so I experimented and I'd say it came out pretty well!

Bruce Weinstein (of the UltimateCook website) is one of my favorite ice cream book authors -- his book is full of diverse recipes and each recipe is followed by a plethora of variations. My husband loves peanut butter, so we are also a big fan of The Ultimate Peanut Butter Book.

On another note, I had little bit of a fun experiment last week. I wanted to draw ice cream at the studio last week. I bought an Haagan Daz Vanilla and Almonds Ice Cream Bar at the store next door but soon realized that I had to run out and that I wouldn't be able to draw the ice cream bar before I left. Luckily living recent weather has dumped a lot of snow in New England and I decided to bury the ice cream (box, wrapper and all) in the snow. When I came back four hours later I had about a half an hour of drawing time! (The drawing wasn't worth showing!) In addition to the snow freezer I made, I am sure the chocolate shell kept the ice cream a bit in tact too, because as soon as I cracked the shell, the ice cream was a soupy mess...Long story short, snow makes a good freezer in a pinch, though I am sure our ancestors figured this out well before I did!

Friday, January 11, 2008

Very Cherry

Here's the outcome of the red hot cinnamon and cherry ice creams. The red hot cinnamon was made too close to the book club starting time and didn't get enough time to freeze harder -- before I got to take a picture, it was too soupy. The cherry was more photogenic as you can see on the left.

Here is my bit of feedback.

1. Red hots. So hard to find. I thought, "Oh, Valentine's day candy is out, I'll find them at CVS." Two CVSes and even the help of my friend Nicole, but no luck. Luckily Dairy Fresh Candy in Boston's North End had them. Save! Well worth is though, this red hot cinnamon is still one of my favorites.

2. Cleaning the dasher (a.k.a. paddle). I hate it. I don't know if it is just the dasher on my Cuisinart, but I find it so hard to get all the ice cream from it when transfering to another container. There are so many nooks and crannies. I find my self fighting the dasher, the melting ice cream, and time. Not so fun. In the end I lose some of my ice cream to melted puddles in the kitchen sink. Overall I love my Cuisinart, but I would be interested in feedback on other machines.

Over all, the ice cream was a hit at book club. Not sure if it is the most efficient thing to bring to a party...its not so much a nibbling food, but Heather made some amazing cakes and alas, what is cake without ice cream?


Tuesday, January 8, 2008

Now we're two scoops!

Welcome Bethany, an experienced and connoisseur of making ice cream to the Scoopalicious team! So I thought it'd be boring to just hear my journey alone learning to make these tasty treats so my ice cream mentor has joined Scoopalicious...now we're two scoops instead of one :) and plan to share everything ice cream and more.

Two Scoops and Three Thousand Tasting Spoons

I made two different types of ice cream last night and froze one of them this morning. My book club is going to eat well -- these two flavors are to accompany another member's molasses cupcakes!

I used a base from Gelato, Sorbet, and Ice Cream by Elsa Petersen-Schepelern with stunning photos by James Merrell.

I divided the mixture into two parts as they suggest in the book, and to one I added 1 tsp of cinnamon and about a half a cup of red hots. To the other I added 1 cup of cherries, a quarter cup of cherry syrup and about a teaspoon of Trader Joe's awesome vanilla bean paste.

One thing I hate about making custard based ice creams is the vague "coat the spoon" direction. What the heck does this mean? I am never sure it has coated the spoon and then I get that scrambled egg thing -- which isn't the end all be all. I just learned in David Lebovitz's The Perfect Scoop that you can put the warm scrambled eggs in a blender to save the mixture. I have also in the past poured the mixture through a strainer.

Another thing Lebovitz did (man, this may be my new favorite book!) was give me a good description of the coated spoon thing. A couple of tips I picked up:
  1. your finger leaves a definite trail in the custard
  2. an instant read thermometer should read between 170°F and 175°F (they'll scramble above 185°F)
Red hot ice cream still needs to freeze but I will write in a couple of days about the final outcome as well as the group's reviews and hopefully post pictures as well!

In the meantime, here is a link to and an image of some super cool tasting spoons my sisters bought me for Christmas! Aren't they pretty? Not sure what I am going to do with three thousand spoons, especially since I also like to recycle, so despite my husband's protests, these will go in the sink to be washed and reused, but they certainly are pretty and will come in handy at the annual ice cream party I have!

Sunday, January 6, 2008

Where to begin?

With so many recipes and advice out there it was difficult to know where to start. Do I use eggs? Is the base cooked? Am I using the right milk? So my trials begin. I figured the most important question to start with was what kind? So since Mint Chocloate Chip is my ultimate favorite I tried a similar Peppermint Chocolate...Yum. I searched through some recipes, got my KitchenAid set up, and got started. I quickly learn that making the ice cream is really not that difficult, its having the patience with the whole process. No you don't mix cream and put in a machine and you have yummy ice cream. Its 24 painful hours until you actually get to enjoy your dish. So I followed the recipe to a T, slowly boiling my ingredients, slow whisking it into the egg yolks, and then once again slowly bringing it all to a boil. I did read that its important to "slowly" heat the ingredients so I patiently created my concoction. The final verdict of my first ever batch of ice cream...consistency was almost perfect being creamy and smooth and the flavor was great but a little too much peppermint extract(mouthwash aftertaste got to be too much!). Only challenge I found was that it did not freeze very hard. It stayed somewhat soft so I will work on perfecting the solidifying process. My first attempt is a success and motivates me to make more. Here is the recipe I followed.


Peppermint Chocolate Ice Cream
2 1/4 c heavy cream
3/4 c whole milk
1 c sugar
4 large egg yolks
1/8 tsp salt
1 tbsp peppermint extract (I used more...and it was too much)
peppermint bark chocolate chunks


Heat cream, milk, 1/2 c. sugar, and peppermint extract over medium heat to almost simmering and set aside. In bowl whisk yolks, 1/2 c. sugar and salt. Slowly pour hot liquid into yolk mixture whisking as its poured. Return mixture to pan and heat on low stirring consistently until lightly simmering along edges(do not boil). Cool for at least 4 hours in fridge. Then churn is machine according to directions. Add peppermint chocolate 5 minutes prior to end of churning. Made about 1 1/2 pints(maybe a little more).

Wednesday, January 2, 2008

My New Year's Resolution

Who makes a resolution that has the gym and ice cream both involved. I may be setting myself up for failure but this year I make the all too obvious resolution of getting in shape and combine it with my love for ice cream be it one scoop or two. In the second half of my New Year's resolution I plan to learn how to make and enjoy homemade ice cream all year round. What is better than that! Thanks to a wonderful xmas I am now the proud owner of an Ice Cream maker and thus I start my quest to make the perfect scoop of ice cream. The idea for this blog came from my research into how to make that perfect scoop. My findings landed me only on a couple useful sites so I plan to share episodes, mistakes, tips, advice, treasures, and fun that I have while learning to perfect my ice cream and hope that it makes all who reads this scream for ice cream too!

Special thanks to a good friend Bethany, whose love of ice cream too and talent in the ice cream making world have inspired me to start churning!

LinkWithin

Related Posts with Thumbnails